Introduction
In today’s digital world, photography has become more than just capturing moments—it’s about creating visually appealing stories. Whether you’re a professional photographer or a social media enthusiast, photo filters are your best friend. They help enhance the mood, fix imperfections, and give your photos a consistent style. From Instagram aesthetics to product photography, photo filters play a key role in how your image is perceived.
In this article, we’ll explore what photo filters are, how to use them, and the best tools available, including a step-by-step guide to applying filters for different needs. Whether you’re editing selfies or professional portraits, this guide will help you master the art of using photo filters effectively.
What Are Photo Filters?
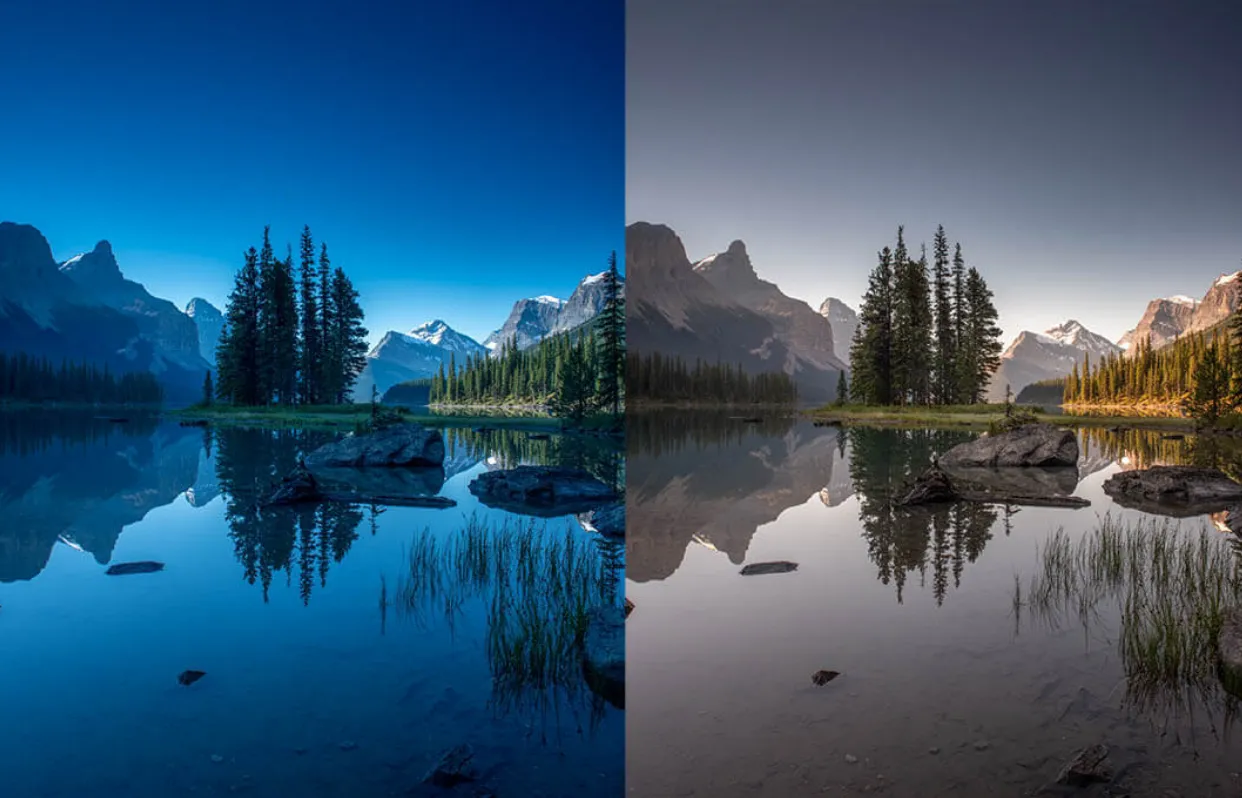
Photo filters are digital overlays or effects applied to images to change their appearance. These filters can enhance colors, adjust contrast, create mood effects (like vintage or noir), and even correct lighting issues.
Common Types of Photo Filters:
| Filter Type | Description | Best For |
| Sepia | Adds a brownish tone for vintage effect | Retro aesthetics |
| Black & White | Converts to grayscale for dramatic look | Artistic photography |
| Vivid | Boosts colors and saturation | Nature, travel, and food photos |
| Soft Focus | Adds a slight blur for a dreamy look | Portraits and romantic photos |
| Warm/Cool Tones | Adjusts temperature for seasonal moods | Beach or winter-themed photos |
| HDR | High dynamic range effect to enhance details | Landscapes and outdoor scenes |
Why Use Photo Filters?
There are several reasons why people use photo filters, both personal and professional:
- Improve Visual Appeal: Quickly enhances any photo with minimal effort.
- Maintain Brand Aesthetics: Social media influencers and brands use consistent filters to create a recognizable visual style.
- Correct Lighting Issues: Fix photos that are too dark, too bright, or unbalanced.
- Set a Mood: Create specific feelings like warmth, drama, nostalgia, or excitement.
- Save Time: Instead of detailed manual editing, filters give quick results.
How to Apply Photo Filters: Step-by-Step
Step 1: Choose Your Editing Tool
You can use many tools to apply photo filters, from mobile apps to professional software:
- Adobe Photoshop / Lightroom (for professionals)
- Instagram / Snapchat (for quick edits)
- VSCO / Snapseed (for casual and artistic filters)
- Canva / Fotor (for social media creators)
Tip: Start with free apps if you’re a beginner, and move to advanced tools as you gain experience.
Step 2: Open Your Image
- Open the chosen app or software.
- Upload or import the photo you want to edit.
Step 3: Explore Available Filters
- Browse the built-in photo filters in the app.
- Hover or preview them on your image to see the changes.
- Filters are often grouped by mood (e.g., “warm”, “moody”, “cool”).
Step 4: Apply and Adjust
- Select a filter you like.
- Use the intensity slider to control how strong the filter appears.
- Optional: Fine-tune with brightness, contrast, saturation, or shadows.
Step 5: Save and Export
- Once satisfied, export your image.
- Save it in high quality for social media or printing.
Best Apps and Tools for Photo Filters
Here’s a comparison of popular filter tools:
| App/Tool | Platform | Best Feature | Ideal User |
| Adobe Lightroom | iOS/Android/Desktop | Professional presets | Photographers & editors |
| VSCO | iOS/Android | Stylish filter library | Social media influencers |
| Snapseed | iOS/Android | Powerful auto-correct | Hobbyist editors |
| iOS/Android | Easy sharing + filters | Casual social media users | |
| Canva | Web/Desktop | Drag-and-drop + filters | Marketers and content creators |
Tips for Choosing the Right Filter
- Match the Mood: Use warm filters for cozy themes and cool filters for fresh or clean looks.
- Avoid Overuse: Too many filters can make photos look unnatural.
- Be Consistent: Stick to a few favorite filters for brand consistency.
- Use Manual Adjustments: After applying a filter, tweak contrast or brightness for a personalized result.
Use Cases of Photo Filters
For Social Media
- Create an aesthetic Instagram feed.
- Enhance stories with filters and effects.
- Use consistent filters to build a personal or business brand.
For Professional Photography
- Add drama to portraits or events.
- Correct harsh lighting or shadows.
- Give clients multiple style options with filtered versions.
For Blogging or Marketing
- Make product photos more appealing.
- Align visuals with your blog or brand theme.
- Highlight key features using focus-enhancing filters.
FAQs About Photo Filters
Q1: Are photo filters bad for image quality?
A: No, if used correctly. Overuse or low-quality apps may reduce sharpness, so always export in high resolution.
Q2: Can I make my own custom filter?
A: Yes! In tools like Lightroom or Photoshop, you can create and save your own preset filters.
Q3: Which filter is best for selfies?
A: Soft focus, warm tones, and beauty filters work best for flattering selfies.
Q4: Do all social media platforms support filters?
A: Most major platforms (Instagram, TikTok, Snapchat, Facebook) support both built-in and third-party filters.
Q5: What if I change my mind after applying a filter?
A: Most apps allow undoing or adjusting the filter intensity. Always save an original copy just in case.
Conclusion
Photo filters are powerful tools for enhancing your images, telling stories, and standing out in the digital crowd. Whether you’re creating a visual brand, beautifying your selfies, or fixing lighting, filters offer a quick and artistic way to transform photos.